If your System is infected with Trojan virus , then most of the Anti virus fail to either detect or deleting the Trojan virus .Even if u SCAN your PC with leading Anti virus it tells no threads are detected , but the Trojan will start its work and almost occupy the Ram and makes your slow down your PC's performance and your system will restart automatically.
The only way to avoid this and to delete this is to use a tool called TROJAN REMOVER and all you have to do is to click scan now. It will search for all Trojan viruses in your drives and memory and delete it automatically .
I've been editing the fifa 09 database to add in more and more new faces and players, due to a virus attack while testing somthing happened and I'd to format and reinstall Windows.After that I updated the windows through Microsoft Windows Update and then I could not open the creation master 09 even after reinstalling it so many times.This error kept showing up
The title may be deceiving, The solution for these kinds of problems are the same.You may have a high end system with so much to deliver than required. In spite of this you get very less out of your computer's performance.Errors like these keep coming The solution for these problem lies with your direct-x version you use. Most of the Games like Assassins Creed, Fear, Counter-Strike , GTA-4, and applications like Creation Master 09, Mozilla Firefox and even Microsoft Windows will crash and give a similar error like shown in the image. When you update your latest graphic drivers,sound driver, it is a must to check if you have a latest driver of Direct-X.This Direct-X is a controller which controls all the applications permissions and memory requirements and hardware and software accelerations for games and media related applications.
To Check your version of Direct-X Goto ->Start->run-> and type dxdiag Then download the latest version
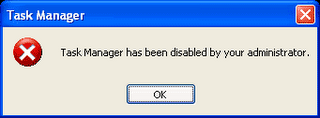
Recently my PC got affected by some VIRUS and after that i removed almost most of the Trojan virus with my KIS Anti virus . But soon after it I noticed some Strange activities in my system like if I press CTRL+ALT+DEL then it i get a error message stating “Task Manager has been disabled by your administrator”.
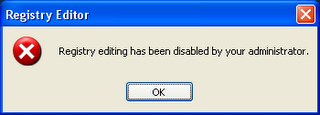
Now I felt that it is very easy to recover from this error by going to Registry Editor and so I clicked Start--> Run --> Regedit . Now only i realized that its not a easy deal because i got a error meassage stating “Registry editing has been disabled by your administrator“.
And I got another problem that Folder Options and even Show Hidden Files & Folder is disabled and I tried scanning my PC with almost all popular Antivirus but nothing had helped me to recover the errors , so i had left with only one option of FORMATTING my windows . Soon after few days again i experienced the same problem again and this time i am not ready to format instead I used a trick and restored my PC to its STABLE STATE . So I thought of sharing it with U.
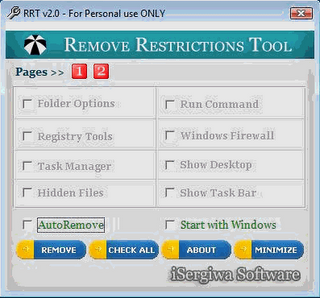
This problem is most commonly caused by a virus called “Brontok“. Brontok virus will make some changes to the system restrictions in order to hide itself from easy detection and also from easy cleaning.
Here’s a free tool called Remove Restrictions Tool (RRT) which is able to re-enables all what the virus had previously disabled, and gives you back the control over your own computer.
Kaspersky Internet Security or usually referred to as KIS 2009, the best anti-virus recognized as the most effective anti-virus and firewall which comes with also a great range of security packs. The problem with most of us is that we don't buy worthy software's like these. So we go for other options of getting a .key file to update KIS everyday and protect our systems. There are wide range of keys available in the internet but the KIS 2009 is clever enough to block all pirated keys to a blacklist table. This blacklist table can be overcome only with a good valid key and we are here to give you a few keys that I bought from market which are commercial license are working.
All these keys are working until FEB 22, 2009 update was done.
We'll The PC version of FIFA 09 has few of the features cut down, The XBOX 360 version is really really good, the PC version of FIFA is not as good as the XBOX version as there are a about 30-50 tricks that are cut down and cannot be done with your keyboard or a single analog joypad. There are few players in the PC version those are cloned from the FIFA 08 Version.You could download the DB master and check the database and you will find it the same.The tricks you see people perform in their XBOX 360 is outrageous and jaw cracking moves.
There is not much of use playing FIFA09 with no tricks enabled, That is with your keyboard you cannot perform advanced skills or combos. If you have a joypad with two analog sticks and you are unable to change the skill or your right analog stick is not working then all you have to do is download this EXCEL file and you'll be able to configure the joypad from windows. STEP 1 :Download the EXCEL file STEP 2 : Fill in the details in the Excel File STEP 3 : Then click on the output which is at the footer and it looks like a tab. STEP 4 : Click and copy the top most output. STEP 5 : Goto Drive where you installed FIFA lets assume u installed it in C:\FIFA 09\data\input STEP 6 : There you will find devdata -> open with notepad -> paste the content STEP 7 : Save it and close it.
For Keyboad mapping you should have a set of values. But it is quite complicated I'll provide my DEVDATA file just paste in the input folder CLICK HERE TO DOWNLOAD. The Controls are Q - change player W - Through Ball E - Sprint A - Cross S - pass D - Shoot Z - Cancel/Dummy move X - golio control/trigger run C - pace control LSHIFT - skill move modifier Direction Controls - arrows 1,2,3, 4 - tactics 5 - mentality
TO VIEW TUTORIAL OF HOW TO DO TRICKS IN FIFA 09 and More Glitches in FIFA 09 --> CLICK HERE<--
I'm a big fan of playing online games and nonetheless I love the game "EA Sports Fifa 09". While I was playing I found out a few glitches in the game and in the replay, I just saved after the match was over.I unlocked the legendary difficulty level so I wanted to try it out so I began playing great and scored a goal very shortly. I went of planned to break my enemies defenses so I decided to take a offensive play and marked my custom formation for Manchester united. I accidentally pressed slide tackle button on my controller instead of the standing takle button and ended up with one man down, Vidic was gone and my custom formation had only 3 defense men. I never played legendary difficulty before so I was unaware of the strength of the PC bot. Fed up of loosing a defencemen I thaught of going down and committing fouls again and again. Soon I ended up with 4 RED cards and 4 YELLOW Cards.Then these glitches showed up. Then I found this glitch with the legendary mode, after fouling so much I never stopped and continued fouling.I never ever got booked after that.There is more I lost ronaldo the best player in Manchester United according to FIFA 09. I had only 3 men with offence and 3 men with defence and 1 goal keepe, But with red cards people cant come back and play again in the field,
Glitch no 1: I was shocked to see Cristiano Ronaldo again.
Glitch no 2 : The problem was Ronaldo cannot do the skill moves he does.
Glitch no 3 : After getting 4 red cards you never get booked red again it may be only yellow cards but if u get 4 yellow cards then you don't get booked for anything.
Glitch no 4: The goal keeper of the opponent team seems very easy to beat even in legendary difficulty.
Glitch no 5: The replay was messed up with Berbatov and Rooney struck at the center after 5 mins of game, This happened in replay and not in the game.
Glitch no 6 In spite of all these glitches I still can defeat a team in FIFA 09.Take a look at the picture.
I've also uploaded the replay of the game take time to look its a 20 min video but you should have FIFA 09 installed.
To look at the glitch DOWNLOAD THE REPLAY To open and play in-game,Copy the downloaded file in "C:\Documents and Settings\Lalith\My Documents\FIFA 09\E. Replay - RED" Then open FIFA 09 and click Load/Export and click on the file RED to load and play the replay. For those who have problem with Cracking FIFA 09 and Serial/keygen issues Download the Crack and Keygen which works for me.Feel Free to ask if u still face trouble with cracking
In this post i am trying to give you some new and useful information about Mozilla Firefox Browser.So If you want to know secret and new things about Mozilla then open Mozilla Firefox and then enter string into address bar one by one given below and then press enter .
These are a few codes that you would like to try.....
1. about:Mozilla When you enter this string in address bar then pressed enter then you will see that this page will show a quote from “The Book of Mozilla” with RED background.
2. about:credits When you enter this string in address bar then pressed enter then you will see that this page will show a page with heading of “Our Contributors” in Alphabatic view. In Short this page will show names of Contributors who created Mozilla.
3. about:plugins This string will show list of installed plug ins in Mozilla Firefox Browser.
4. about:config When you enter this then you will see several setting key, By which you can set all configurations of Mozilla Firefox Browser. But if you don’t know any about it then please don’t try to change it. By these configuration settings you can do anything with Mozilla like You can spped up Mozilla speed by 400 percent etc.
5. about:cache When you use this to get information then by this string you will get all information about Memory cache device and Disk cache device and also your all cache details of Mozilla.
6. about: This will show Logo of Mozilla Firefox with version, Contributors information, License information and Build configuration of Mozilla Firefox.
7. about:buildconfig This will show all build configuration of Mozilla Firefox.
8. about:license This will show all information related to license like Mozilla Public License, # GNU General Public License, GNU Lesser General Public License etc.
Hello Friends , Here I am writing some cool Firefox tricks which are very helpful in using Mozilla Firefox. As we know Mozilla Firefox is the Best and very good browser with extensions, add-ons, Language Packs, Plug ins and themes and many new things by which you can execute JavaScript. Mozilla Firefox also has other features like Tabbed browsing, Pop up blocking, Cookie Manager, Download Manager, pause downloads, JavaScript Console, JavaScript Debugger, Select text and perform search, View Selection Source, Cross-platform, Display icons in tabs and address bar, HTTP Pipe lining, XML Base, CSS generated content, CSS2 selectors, Caret Browsing etc. Below are some tricks and tips by which you can use Mozilla Firefox easily.
1. Here are the Keyboard shortcuts.
- Space bar (page down) - Ctrl+K (go to search box) - Alt-N (find next) - Ctrl+L (go to address bar) - Ctrl+= (increase text size) - Ctrl+D (bookmark page) - F5 (reload) - Ctrl+- (decrease text size) - Ctrl-W (close tab) - Alt-Home (go to home page) - Ctrl+F (find) - Shift-Spacebar (page up) - Ctrl+T (new tab)
2. Sometimes in hurry by mistake you click on close button of Firefox tabs. But In Mozilla Firefox you can remove or move close tab button by about:config. Type about:config in address bar then search for browser.tabs.closeButton in search bar. When you find it double click on it. It will show you a prompt with by default value 1. You can change it to different values for different behaviors.
- Enter 0 to display a close button on the active tab only. - Enter 1 (default Value) to display close button to all tabs. - Enter 2 to don’t display any close buttons. - Enter 3 to display single close button at the end of the tab bar.
3. Now we know Mozilla Firefox have giving feature of multiple tabs , so sometimes it is very hard to handle multiple tabs with mouse, so you can also handle tabs by keyboard. Below are some tips to handle tabs by keyboard.
- Ctrl+Tab (rotate forward among tabs) - Ctrl+Shft+Tab (rotate to the previous tab) - Ctrl+1-9 (choose a number to jump to a specific tab)
4. Here is the Mouse shortcuts for Mozilla Firefox.
- Middle click on link (opens in new tab) - Shift-scroll down (previous page) - Shift-scroll up (next page) - Ctrl-scroll up (decrease text size) - Ctrl-scroll down (increase text size) - Middle click on a tab (closes tab)
5. about:config : This is a feature of Mozilla which lists aaplication and configuration setting setting of Mozilla. You can Get all settings configuration of your Mozilla by enter about:config in your address bar of Mozilla.
6. If you want to speed up your Mozilla Firefox then
- Type about:config into the address bar and hit return. Type network. http in the filter field, and change the following settings (double-click on them to change them): - Set network.http.pipelining to true - Set network.http.proxy.pipelining to true - Set network.http.pipelining.maxrequests to a number like 30. This will allow it to make 30 requests at once. - Now, right-click anywhere and select New-> Integer. Name it nglayout.initialpaint.delay and set its value to 0?. This value is the amount of time the browser waits before it acts on information it receives.
Everyone who uses windows have a problem on creating files with name CON,PRN,NUL and so on, They say it as a bug.But now check for yourself.About the whole issue. Anyone with DOS experience would recognize "nul", "prn" and "con" are not "special files in windows to maintain the FAT table" but are used for typical batch entry. (That's not a bug, that's a feature!)
I still use con (short for console?) on occasion to create test files ala copy con hello.txt " Suggesting that we should all switch to Linux because we can't name a file "con" is retarded. It seems you are implying that if MS released the source to windows then somehow you would be able to live with restricted filenames, perhaps causing you to grow an imagination to discover great alternatives such as "null", "prnt", and "conn".
Until then stick with you Linux where presumably you can create files with any name such as "/", "\!@&#", or "AbooIsADumb@ss".
Those who have DOS they can still create these files with the help of this
I don’t understand why everyone makes Adsense out to sound like some kind of devil. So far, I have a 100% approval rate for my consulting clients. You would think that we spend months developing the site to submit for approval – but to be honest; I spend less than a day (if that!)
What we found is that Google is not nearly as picky as they make themselves sound to be. The trick is to make your site in such a way that you are just providing content; we have found that the less selling you do on your approval site, the better.
Don’t worry, once you’re approved you can use that code wherever you want – so put it on other sites that sell later. But for the purposes of getting approved, try to limit to just content, content and more content!
Now, for the disclaimer before we start talking about how to get your site approved for Google Adsense. I am not a member of Google at all, everything I am about to say is all speculation and experience. I have helped over 50 clients get approved for Google Adsense without having even 1 of them not get approved – we have 100% approval rate on FIRST try.
All I am going to teach you is exactly what I do for them.
There are three main elements that I focus on when getting a client approved:
1.Site look and feel – Not that Google wants a $10,000 professionally designed website, but they also don’t want some piece of junk. Make sure to at LEAST have a presentable website – even if it is just a few tables and a solid background color. Avoid using tacky backgrounds or unprofessional color contrasts.
2.Content – The most important – Google believes in content. If you try to get a website with just a few pages approved, I don’t think you will have any luck. You need to have at least 15-20 pages, preferably, 15-20 pages of articles/resources, a.k.a. content.
3.Traffic – Many “experts” say that Google looks to see what kind of traffic you have and that they do not approve new sites with no traffic. My experience says that these experts are FULL of it. BUT, just to be safe, before you submit your site for approval – try to get your site some traffic.
Here are useful tips you need to make the entire approval process easier and quicker:
>> Get content from article directories like www.goarticles.com – just put those articles in your site, getting 15-20 is easy.
>> Before you submit your site for approval, post at some forums with your website’s link in the signature file – this will help you get some immediate traffic.
>> Make a very simple website with 15-20 articles, a contact us page, a privacy policy and the typical disclaimer.
That’s it – you’re ready to get approved for Google Adsense. I know I made it sound too easy, but honestly, we have a track record that proves it. And remember, if you do not get approved, you can always fix things and try again.
This is the most important Site which is started by a group of engineers for latest updates , downloads , Windows tricks and many Internet tips and Tweaks .It's all about moving your digital life smoothly. Having problems with your windows or linux machine? Or want to power pack your machine with unlimited tweaks? Technize is your one stop solution.
This site allows you to start your own chat room. You can also easily add your free chat room to your website, blog, eBay page, social network profile and virtually anywhere on net. 99Chats.com allows you to extend your interaction with your visitors, providing you with realtime text messaging on almost any web resource.
99Chats.com is free and could be fully customized, from colors, background and fonts to border style, size and design, to fit perfectly on any web page design. 99Chats.com supports all languages. 99Chats.com is totally free of charge and free from branding, it takes 3 steps to create a room, simply sign up at
Vocaroo is a free service that allows users to create audio recordings without the need to install any software. All you need to provide is a microphone. I used the microphone built into my MacBook to make the recording below. What I like about Vocaroo besides the ability to record without installing software is the option to embed the recording anywhere. After completing your recording, vocaroo gives you the choice to publish it or to scrap it and try again.
Applications for Education :
Vocaroo is an easy, free service that teachers and students can use to create audio recordings for use in slide shows or in blogs and websites. I recently saw one instance of Vocaroo being used to embed audio recordings into Google Earth place marks.
Are you tired of signing in to your Orkut account to read your scraps and will u go to the Browsing center for Orkutting ? No Need, Here after u can save your money and time just by following some simple steps .
1) First log in to your Orkut account and click on your Orkut profile Photo to get your profile..Now, go to the address bar and copy the URL and note it somewhere.The URL must look like this:http://www.orkut.co.in/Main#Profile.aspx?rl=mp&uid=(some 18 digit no)
2) Then, go to Orkut feeds site by clicking it here :Orkut feeds..Now enter the Orkut URL that was just copied into the box given and click on Subscribe..Now copy the URL of the resulting page from address bar and note it down..This gives the RSS feed of your scrap..
3) Then ,register your mobile and get an account in Google Sms channels by clicking this link: Google SMS Channel
4) Next, go to Create new SMS channellink and create a sms channel by providing a name to it and in Source option , choose RSS/Atom feed box and paste the RSS feed URL (without http://) that was copied from Orkut feeds...Also tick the title and body check box, keep the channel as private, preview it and create the channel..Thats it! You are done!!..Now you can get your scraps as SMS in your mobile..
NOTE : This trick works only for scrapbooks that are not locked by user. And the SMS gets delivered only at frequent intervals and not in real-time.
Do you maintain multiple Google Accounts? Solve that headache of logging in and out different accounts in Firefox by this trick. I feel life can get complicated if you operate more than one Google Account and have associated different Google services with different accounts.
For example I have two Gmail ID's. One India[at]gmail for my work and another PCtrickz[at]gmail for personal use. I am a big fan of Firefox and each time I need to read mails, I am annoyed of logging in and out for different id's.
Well this trick has done wonders for me, Hope it works for you to.
Step 0 : - Download Firefox for more efficiency(optional).
Step 1: - Open system "properties"(by right clicking my computer). - Choose tab "advanced", click to "environment variables" button. - In "system variables" section, click "new". - Type this information to each textbox.
Step 2: variable name: moz_no_remote (should be all small letter). variable value: 1
Step 3: - Open firefox icon’s properties (from desktop and quick launch). - Add extension -p to command line(like “c:\program files\mozilla firefox\firefox.exe” -p). - Press ok.
When you will open firefox it will prompt for profile selection create a profile,open firefox login to orkut open once more use another profile login.
Note : Use this tech. only for good purpose , never have a intention to misuse any of the technologies ..thank you
If you are a Bit Torrent downloader, you know what slow download speeds are like...frustrating and annoying, to say the least. Instead of getting your music or movie within a couple of hours, your software predicts it will take 2 to 4 days. Here is a way to solve the speed problems regarding the torrent downloads.
Now, while many of the speed factors involved are out of your control, there is at least one thing you can do at your receiving end to improve this speed. It is called "Port Forwarding", or "opening your specific TCP/UDP ports". This is how it works.
1) That blue or green network cable coming out of your computer/modem/router is actually a busy highway comprised of 65,536 tiny electronic lanes (yes, over sixty-five thousand little lanes for your electrons). Each lane is called a "port", and each port is designed to allow only specific types of information through. Many ports are assigned in a semi-standardized way. Here are some example port assignments:
HTML pages: port 80
FTP file transferring: port 21
World of Warcraft: port 3724
POP3 email: port 110
MSN Messenger: port 6901 and ports 6891-6900
Everquest: port 1024
Bit Torrents Client: port 6881-30000
2) Bit torrents, by default, first look for port 6881 to enter/exit your computer. If port 6881 is closed for whatever reason, torrents then go to port 6882, then 6883, and so on, until it eventually tries port 6999 before giving up.
3) Every ISP, and every home router, can optionally block any of these ports with the intention of preventing hackers and controlling the network.
4) If you tell your own personal router and firewall at home to open (aka "forward") port 6881 and port 6882, then your bit torrents will find their way into your computer that much faster. Sometimes up to 5x faster.
Yes, opening ports does increase the possibility of getting hacked by unwanted bad guys, but there are means to reduce that threat while still getting fast torrent download speeds.
The speed of download may increase significantly if you have a high speed internet if you use a slow internet connection speed like say 256kpbs to 2mbps the speed that changes the download is very little.
Forwarding port must be accompanied by a good firewall and anti-virus.
The Procedure for port forwarding is quite difficult but can be illustrated step by step and the procedure varies for every router/modem.
To connect your Computers using a switch, hub or Crossover Cable,Goto ... My Network Places which is the utility for browsing network resources (places) in Microsoft Windows ME, Windows 2000 and newer Windows operating systems. Network resources include:
shared file folders on other computers
networked local printers
Web links (URLs)
My Network Places can be accessed from the Windows Start menu (or through My Computer). Launching My Network Places causes a new window to appear on the screen. Through this window, you can add, search for and remotely access these network
Searching for Network Resources
Network browsing is likely the feature of My Network Places you will use most often. Through My Network Places, Windows can automatically search for shared network files, printers and other resources present on your local network.
For example, many people use My Network Places to confirm that each computer set up on their home network can "see" all the other computers.
To browse a list of available network resources, choose the "Entire Network" option in the left-hand pane of My Network Places. Then, in the right-hand pane, several options may appear for the kinds of networks available to browse. Choose the "Microsoft Windows Network" option to browse resources available locally.
Each local computer found in My Network Places will be listed under its Windows workgroup name. In home networking, all computers should be set to use the same Windows workgroup, otherwise they will not all be accessible through My Network Places.
Add a Network Place
The "Add a network place" option can be found on the left-hand size of the My Network Places control window. Clicking this option brings up a Windows "wizard" that guides you through the steps to define a network resource. Here you can specify the location of the resource by entering a Web link or a remote computer / folder name in the Windows UNC format.
The Add a Network Place wizard allows you to give descriptive names to the resources you add. When finished with the wizard, an icon similar to a Windows shortcut icon appears in the resource list.
Along with the resources you manually add to My Network Places, Windows will sometimes automatically add other resources to the list. These are places on the LAN frequently access.
Removing Network Places
Removing a network resource from the My Network Places list works as in Windows Explorer . The icon representing any network resource can be deleted as if it were a local shortcut. During a delete operation, no action is taken on the resource itself.
View Network Connections
The My Network Places task pane contains an option to "View network connections." Choosing this option launches the Windows Network Connections window. This is technically a separate feature from My Network Places.
My Network Places - Summary
My Network Places is a standard feature of Windows starting in Windows ME and Windows 2000. My Network Places allows you to find network resources. It also supports creating descriptively-named shortcuts for network resources.
My Network Places can be a useful troubleshooting tool in situations where two local networked devices cannot communicate with each other. Resources that don't appear in the Microsoft Windows Network are likely networked improperly. Resources will not appear in My Network Places for any of the following reasons: